How To Prepare Your Oven For Thanksgiving
Whether you’re a regular home chef or a special occasion meal-maker, you’ll need your oven soon if you plan on having or attending a Thanksgiving get-together. The last thing you want on Thanksgiving Day is to find that your oven isn’t working properly, or you don’t have enough time to cook everything you were planning to.
Follow the tips and instructions below to help you prepare your oven (and your mind) for the upcoming challenge of Thanksgiving cooking!
First, Ensure Your Oven Is Clean and Running Properly
Before doing anything, check the inside of your oven to make sure it’s clean. A dirty oven won’t cook your dishes as effectively and will even affect the taste! We recommend cleaning heavily used appliances every 1-3 months, and once or twice a year for mildly used ones.
Gather Your Materials
Even if your oven comes with a self-clean feature, we recommend cleaning the oven two weeks before Thanksgiving (in case of breakdown). This is because the internal temperature of the oven can raise up to 1000°F during a self-clean which risks damage to the circuit board, fuse, or thermostat. Cleaning it by hand instead allows you to do a thorough clean without risking your oven’s ability to function, especially if your oven is more than reasonably dirty. For a homemade cleaning remedy, gather these materials:
- White Vinegar
- Baking Soda
- Clean cloth/rag
- Scouring pad
- Dish Soap* (optional)
- Ammonia* (optional)
If you decide to use ammonia or a chemical cleaner, we recommend you also gather:
- Rubber cleaning gloves
- Safety Glasses
Cleaning the Inside of Your Oven
After you have gathered these materials, fill an oven-safe bowl with white vinegar and place it on the middle shelf in the oven. Set the oven to heat to 270°F. When the oven has reached this temperature, turn it off and leave it closed for several hours to let the vinegar steam. Remove the bowl of vinegar after a few hours. You should be able to wipe away any food residue without much effort. Use a scouring pad and a mixture of equal parts water and vinegar to scrub whatever tough spots remain.
If your oven has built up years’ worth of grime, a bit more elbow grease and a stronger solution may be required. In this case, you might follow the instructions for a chemical cleaner that is oven specific. Alternatively, you can make a mixture of ammonia and water (1/2 cup of ammonia and one quart of water; dip a cloth into the mixture and use to wipe the interior walls). For extra dirty oven racks, fill a tub with hot water mixed with some dish soap and let the racks soak for 10 – 15 minutes. Then you can use a scouring pad to scrape off the softened grime.
For cleaning the inside of the oven door, begin by adding a little water to baking soda and mixing it into a paste. Spread this paste over the door and let it sit for 20 mins. You can wipe it clean with a dry cloth afterwards.
Checking Your Oven’s Temperature Accuracy
After you have brought your oven back to its former glory, it might also be a good idea to check how accurate its temperature reader is. Many ovens can read 20°F off or more from the actual temperature. This is because the sensor is in the wall, closer to the source of heat. To properly cook food, you’ll want the temperature to be accurate within a 25°F range (with the temperature being not more than around 12°F too high or low). By using a cheap oven thermometer with a dial or a digital probe temperature reader, you can gauge your oven’s actual temperature.
To test your oven, place a dial oven thermometer or the metal probe of a digital temperature reader on the center rack (place dial type where you can read it through the oven door window). Set your oven to your desired temperature for a dish you plan to make. Over the course of 2 hours, write down the temperature from the thermometer every 15 minutes. Then average the temperatures to find your oven’s actual average. Knowing your oven’s actual average temperature will help you cook dishes that are finicky about heat.
Another common way to gauge hot and cold spots in your oven is by using coconut shavings or bread slices. Spread out a thin layer of coconut shavings on baking sheets or line up bread slices across all the racks. As your oven cooks them, take note of where the coconut shavings or bread slices begin to brown first. This will allow you to determine and map out the “hot” and “cold” spots in your oven. You can use to your advantage when cooking multiple dishes at the same time.
Planning Your Meals and Cooking Schedule
When your oven is clean and you’ve noted how the temperature fluctuates within it, it’s time to plan out what you intend to make for the upcoming feast. Yes, we mean every detail of what you are making and when. This way you are not scrambling on Thanksgiving Day only to realize you don’t have enough time to make all the delicious sides that are the real MVPs of a Thanksgiving meal.
When you have determined the dishes you want to prepare, it’s time to divvy up which day what gets cooked. That’s right, we mean you can prepare a lot of the foods the day before and keep them in the fridge overnight. The day before is ideal for making desserts or traditional sides like cranberry sauce, which are best enjoyed at a cooler temperature. Other sides can be easily reheated in the microwave before serving.
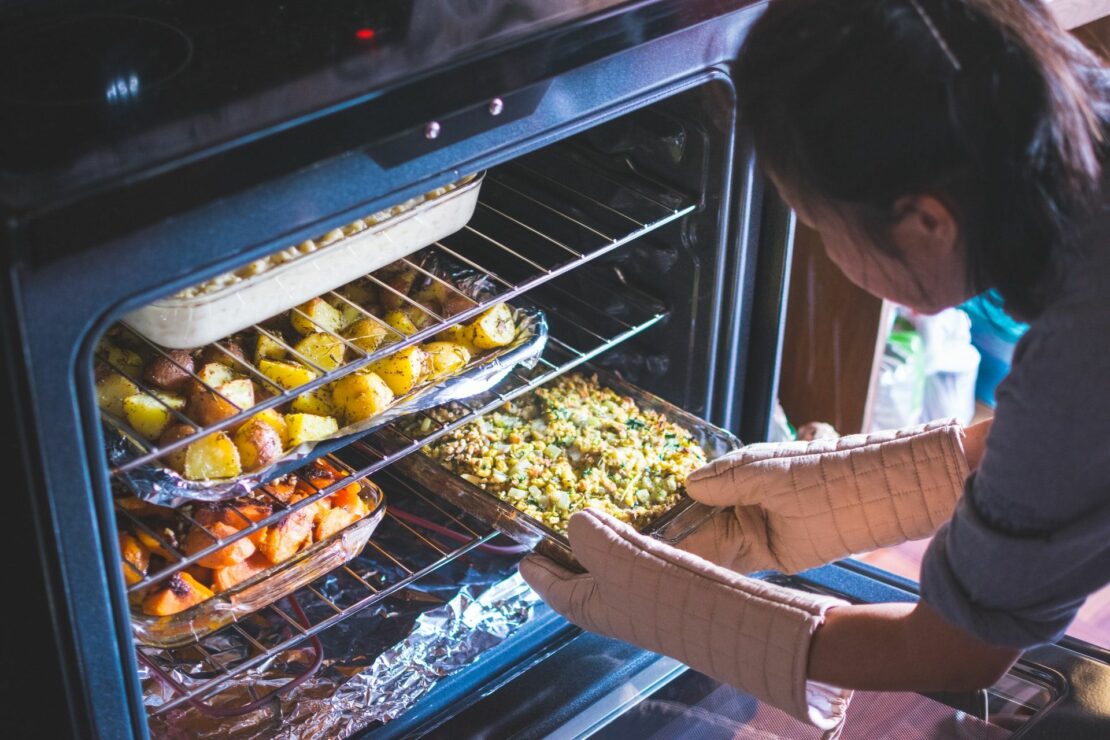
For dishes you plan to make Thanksgiving Day, you can play “oven Tetris” to fit multiple foods together. You can group them by cooking time and/or temperature. If you made an oven heat map like mentioned above, you can determine where to place different dishes. For cooking or reheating at a lower temperature, stick foods that need more heat in the “hot” spots and cook them longer. If cooking at a higher temperature, stick foods that require less heat in the “cold” spots. You can also consider covering them, and cook them for a shorter period. Be wary of flavor mixing, because the steam and aroma radiating off dishes as they cook can mix and affect the flavors of one another. To help air circulate, use the convection setting if available on your oven appliance or rotate dishes from back to front or between shelves. Take advantage of the time a turkey needs to “rest” to cook these extra sides!
Other Useful Tips
- Identify problems early – run a test dish in your oven to make sure it is functioning properly. If you notice any issues, you’ll want to have a couple weeks before the holiday as a buffer to schedule a repair if needed.
- Run a self-clean cycle after the holiday cooking – this way if a problem occurs, you won’t have to scramble to find a service repair. Wipe down the oven’s interior with a damp cloth after the cleaning cycle finishes and the oven has cooled down.
- Don’t overload your oven – While you can squeeze multiple dishes at a time, make sure to leave at least 2 inches of space between the dishes and oven walls.
- Consider other cooking options – many meals can be made in alternative ways or using different methods. Consider making meals using a stove top, microwave, grill, slow cooker, pressure cooker, deep fryer, or multi-cooker (like the Instant Pot™). You can also prepare “no cook” dishes like a fresh salad of greens or fruit!’
If your appliance is experiencing issues unrelated to keeping it clean, Danny’s Appliance offers free diagnostic services when you schedule a repair! Our factory-certified technicians will come to you and inspect your appliance, no matter the make and model. Or if you’re looking to make a replacement, we offer high-quality appliances at unbeatable prices. Stop by our showroom in Providence, Rhode Island or shop our appliances online to browse our selection of ovens. We also carry other household necessities like dishwashers, dryers, washers, and refrigerators!